Walking cycle animation in Blender 4.0+
Upgrading My 3D Skills with Blender 4.5
I’m getting back into 3D modeling and animation for my VR games, and I need to refresh my skills using Blender. I’ve been taking a course from the famous artist Grant Abbitt. It’s been fun, and I even made a funny animation!
Blender is now at version 4.5, and there are some big changes. One important update is that to paint weights for bones, you now use Alt + Left Mouse Click instead of Ctrl + Left Mouse Click. This is something to keep in mind.
Tips for Making a Walking Animation
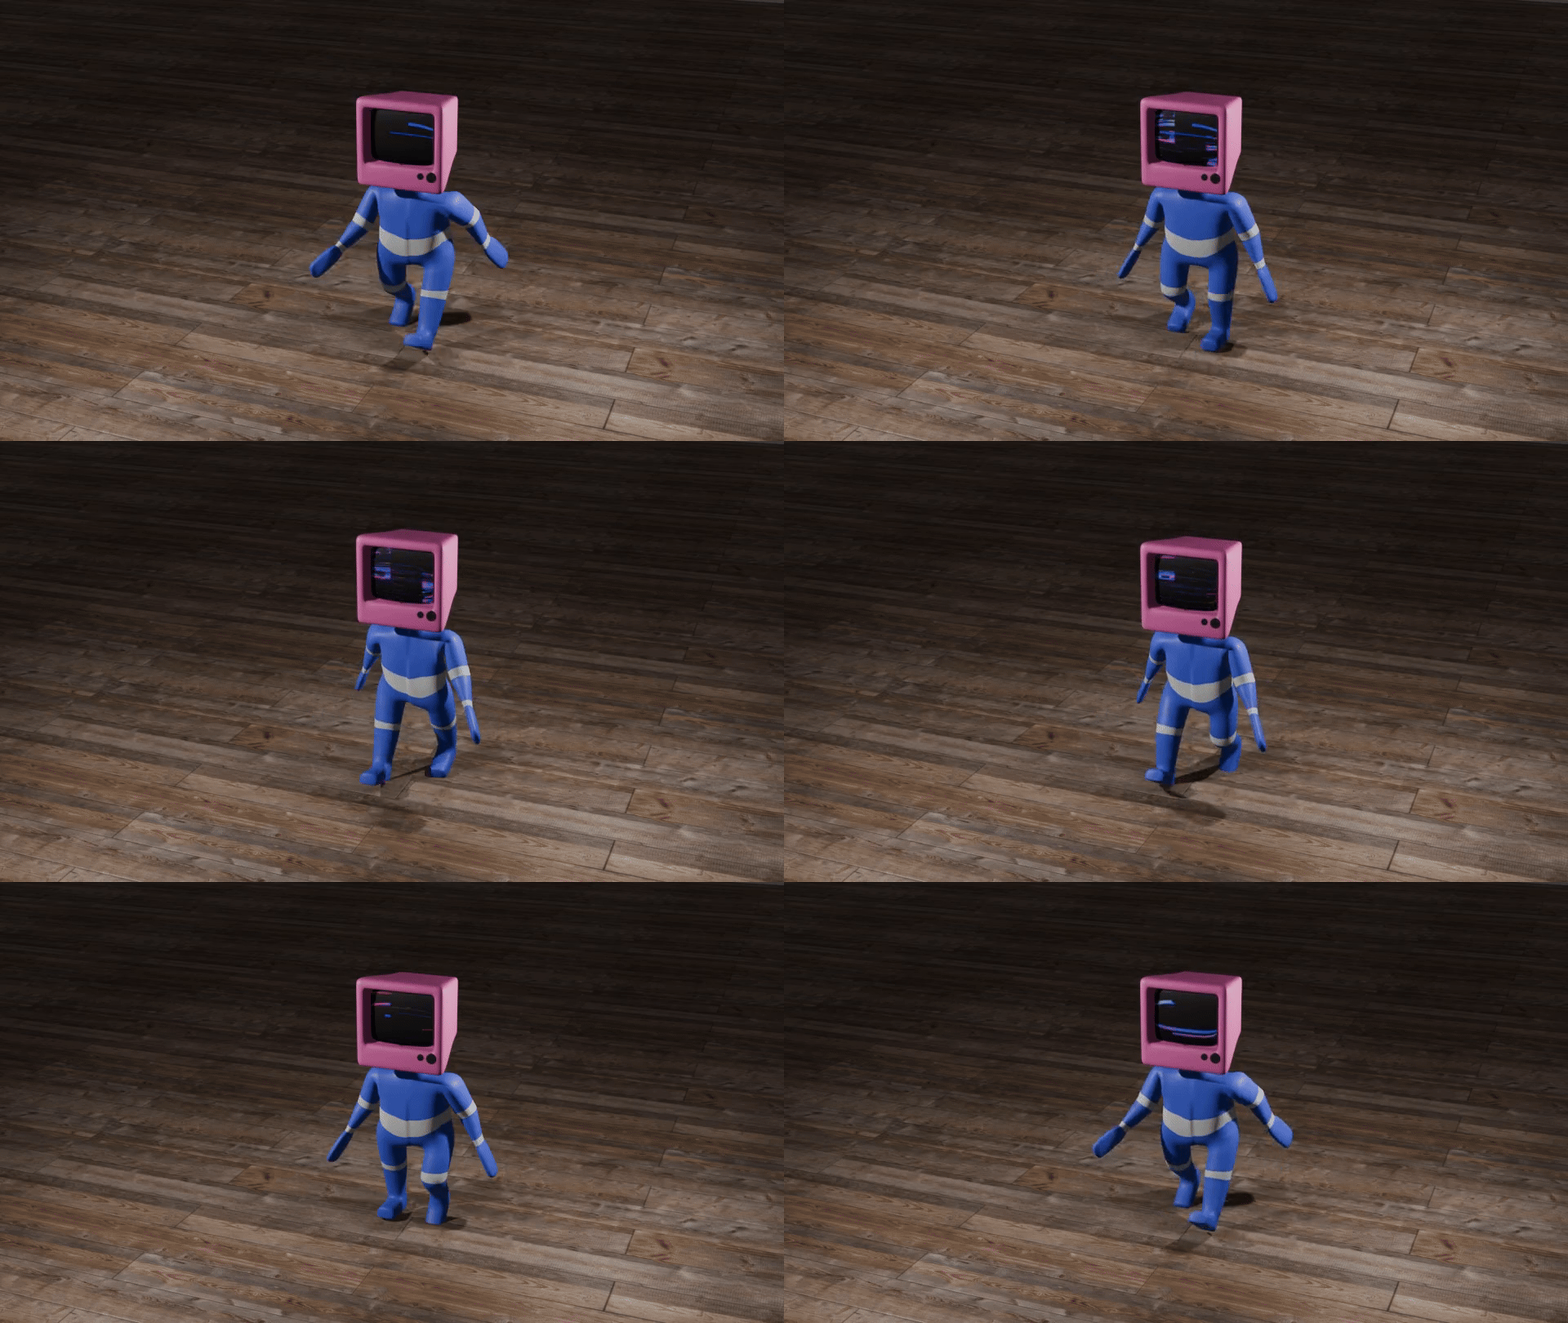
For animating a walking cycle, using a reference image helps a lot. I have a handy picture where the numbers show the frames. The blue part is the robot’s front, and the red part is the back.
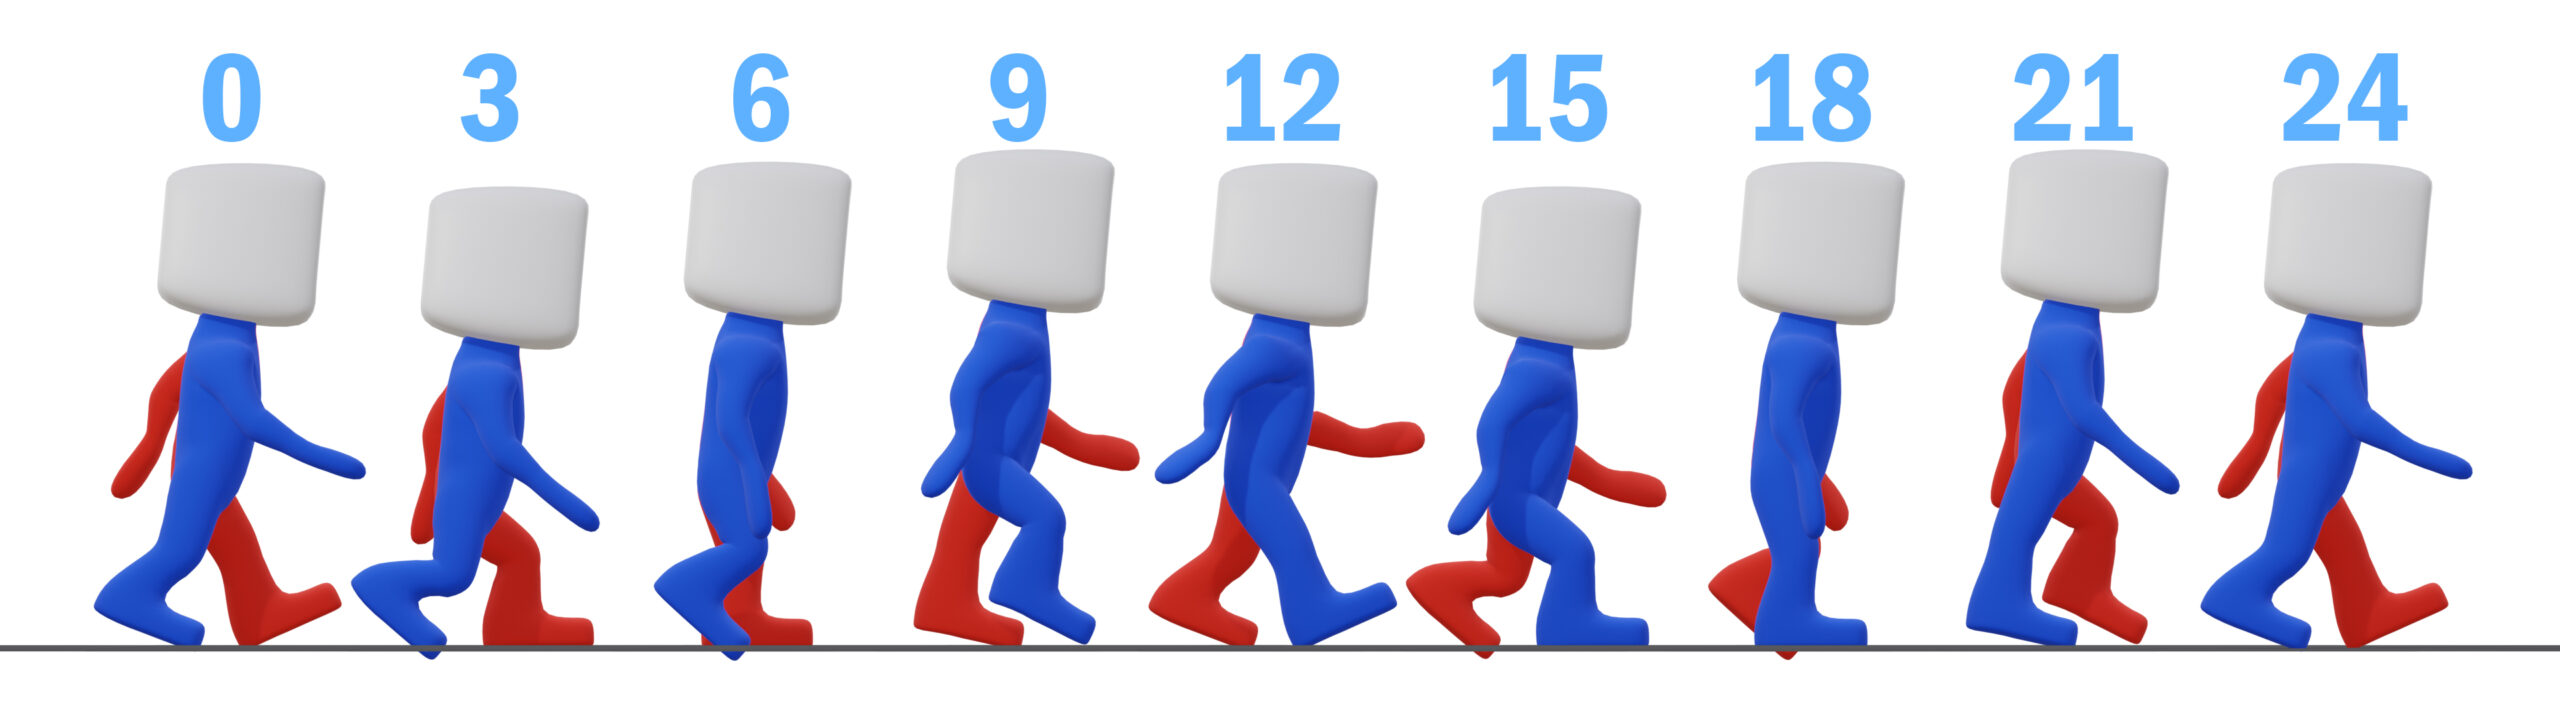
This picture is extremely useful. The numbers are the number of frames, and the blue color is the front side of the robot and red is the back side.
A walking cycle usually has 24 frames, but here’s a cool trick: you only need to create 4 key frames! Here’s how:
- Frame 0 is the same as Frame 24.
- The frames at 0, 3, 6, and 9 will match up with frames 12, 15, 18, and 21, but they will be mirrored.
After you set up the armature and add Inverse Kinematics (IK), just adjust the robot’s pose to match the reference image. It’s really that easy!
Feel free to check out my Blender source file to see how it all works. Happy animating! 😊